In my previous entry I showed you step-by-step instruction of how to develop a simple code for general text-based chat app. If you haven’t seen it yet, give it a try: Create Your first Chat App with PaLM 2. In this short entry I want to show you how you can test/run/showcase such application using Google Colaboratory

Quick introduction to colab
Google Colaboratory, commonly referred to as “Colab,” is a free cloud service hosted by Google to encourage Machine Learning and Artificial Intelligence research. It provides a versatile environment that combines executable code, rich text, and graphics to help users create, collaborate on, and share documents. Colab is based on the Jupyter notebook environment and supports Python 3 interpreters. It offers free access to computing resources including GPUs and TPUs which can be particularly beneficial for resource-intensive tasks. This platform is widely used for educational purposes, data analysis, and prototyping, as it allows users to write and execute code, save and share their analyses, and access powerful computing resources, all through their browsers without the need for any setup.
Sounds perfect for our use case, doesn’t it?
Building your own notebook
I have uploaded my notebook on my github: bison_chat-app.ipynb. You can simply upload it to your google drive and use it as-is, or use it as reference when building your own notebook! There is also a full source code of the colab notebook below in this article!
To import my notebook you can simply specify github as a source code and copy the github url
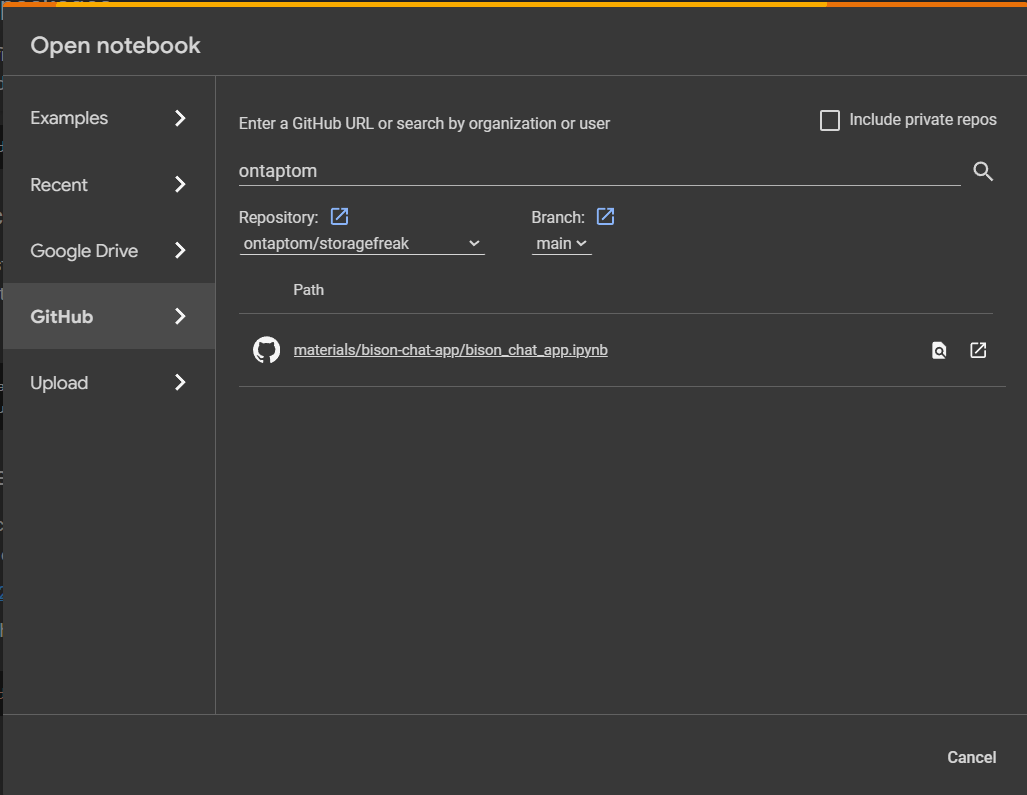
Click on the notebook/path and that’s it! Once opened you should see an option to Copy to Drive which will create your own local copy on your google drive.
As as quick reminder – notebook is a document in colab that can have both code and text blocks.
I tried to add all the instructions as clear as possible to explain 4 steps we’ve got. Of course you can run them (besides pre-installing required packages) even in a simple step if you prefer, but in this way it might be a bit easier to understand.
Let’s see the notebook!
"""bison_chat_app.ipynb

Automatically generated by Colaboratory.

Original file is located at
    https://colab.research.google.com/github/ontaptom/storagefreak/blob/main/materials/bison-chat-app/bison_chat_app.ipynb

# Run Simple PaLM2 Chat Application in  Your colab!

## Step 1. Install required packages.

Please note that after executing first step you will be asked to "RESTART RUNTIME" (dedicated button appear). Hit the button, it should restart colab runtime in few seconds and you can continue.
"""

! pip install google-cloud-aiplatform


"""## Step 2. Setup authentication to your google cloud environment.

You restarted runtime after first step completed yet? OK - great, let's go with step 2 - In this colab we'll use our own permission to execute code. For that, run the next command, it will ask you to confirm you give permissions to this notebook to use your google cloud credentials when intearcting with GCP APIs.
"""

from google.colab import auth as google_auth
google_auth.authenticate_user()


"""## Step 3. Let's specify the google cloud project

Run the below command and once prompted, give a project name you wish to use for your google cloud chat. If you are not sure what I'm asking about check out this article:

Create Your first Chat App with PaLM 2

When I describe how to build such app in the first place.
"""

project_id = input("Provide Project ID:")

"""## Step 4. Time to run our application!

You can use mine code (describe in article at storagefreak.net), modify it, or use your own instead of mine. Just make sure you pass a proper project id
"""

import vertexai
from vertexai.language_models import ChatModel, InputOutputTextPair

vertexai.init(project=project_id, location="us-central1")
chat_model = ChatModel.from_pretrained("chat-bison")
parameters = {
    "candidate_count": 1,
    "max_output_tokens": 1024,
    "temperature": 0.2,
    "top_p": 0.8,
    "top_k": 40
}
chat = chat_model.start_chat()

# Informing the user about how to exit the chat
print("Welcome to the chat! Type 'quit' or 'exit' to end the conversation.")

while True:
    user_input = input("You: ")
    if user_input.lower() in ['quit', 'exit']:
        print("Exiting chat. Goodbye!")
        break

    response = chat.send_message(user_input, **parameters)
    print(f"Response from Model: {response.text}")

"""That's it! Just make sure to enter 'exit' or 'quit' to finish the conversation."""