In the ever-evolving landscape of AI, Google’s PaLM 2 has emerged as a revolutionary force, unlocking new potentials in natural language processing. Imagine harnessing this cutting-edge technology to create something as interactive and engaging as a chat application. In this blog entry, I’m thrilled to show you exactly how straightforward it can be to develop your very first Python application—a “chat application” that interacts with the remarkable chat-bison model from the PaLM 2 family.
Fair warning: a very basic understanding of Python is required, but you definitely do not need to be a pro!

We’ll dive into the world of Generative AI Studio, a remarkable tool (set of tools really) that provides us with a baseline of code. From there, I’ll guide you through tweaking and customizing this foundation to fit your unique vision for the app. This isn’t just about coding; it’s about creativity and bringing your ideas to life.
So, whether you’re a seasoned developer or a curious beginner, join me in this exciting venture into the world of AI-driven communication. Let’s create something extraordinary together!
Generative AI Studio
Generative AI Studio is a Google Cloud console tool for rapidly prototyping and testing generative AI models. It provides a no-code and low-code environment to explore the capabilities of foundation models, customize them for specific tasks, and deploy them into production applications.
It can be accessed from Vertex AI section, or directly via this Generative AI Studio – Overview link. If you access this section for a first time, you might need to enable some APIs. And Google has you covered – there should be a button waiting for you stating Enable all recommended APIs. Once completed, give it another minute or two before continuing. So, without further ado, we are going to navigate to Language and Start a conversation -> TEXT CHAT selection. You should see a window very similar to this one:
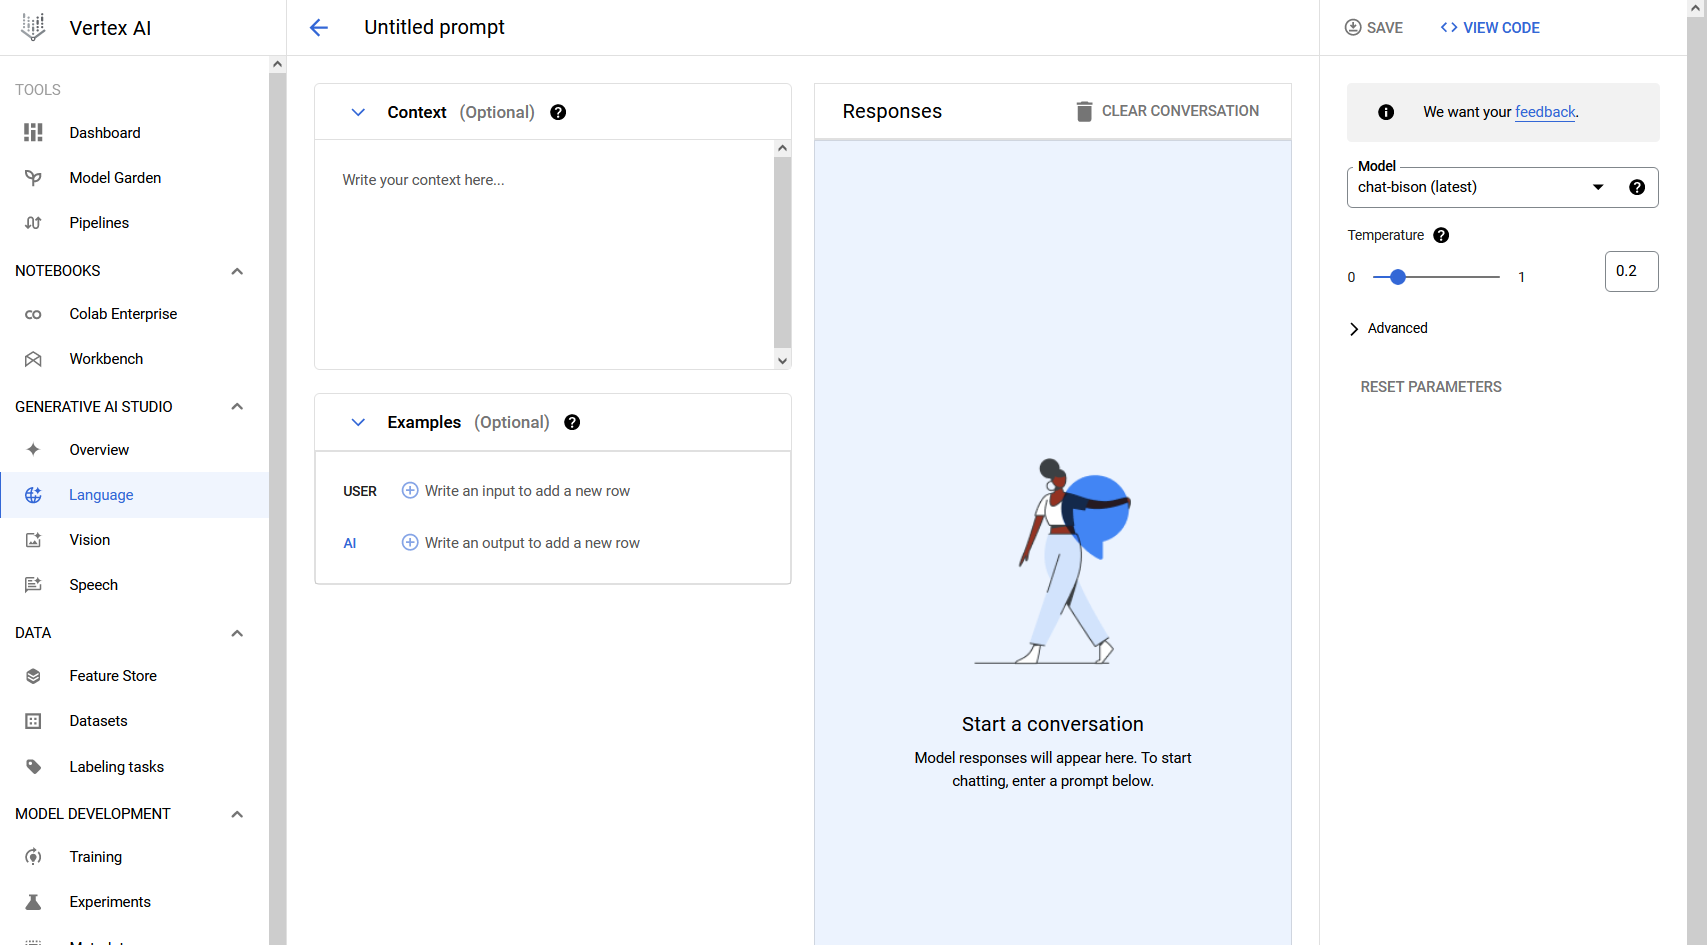
You can provide context, give examples to specify USER and AI role, or you can leave it as default (where AI is acting as helpful assistant). Next step would be to.. well.. start a conversation. At the bottom of your screen you should see “Enter a prompt to begin a conversation”. I will enter two messages, first “Hi, I’m Tomek”. and second “how old is google”. Within each message we should get a response from AI. Pretty cool, isn’t it? But now, the fun part, let’s get the code! On the top right you should see an optoin “VIEW CODE”, click on it, and.. brilliantly we’ve got our python code! Mine looks like that:
import vertexai
from vertexai.language_models import ChatModel, InputOutputTextPair

vertexai.init(project="<my_project>", location="us-central1")
chat_model = ChatModel.from_pretrained("chat-bison")
parameters = {
    "candidate_count": 1,
    "max_output_tokens": 1024,
    "temperature": 0.2,
    "top_p": 0.8,
    "top_k": 40
}
chat = chat_model.start_chat()
response = chat.send_message("""Hi, I\'m Tomek""", **parameters)
print(f"Response from Model: {response.text}")
response = chat.send_message("""How old is google?""", **parameters)
print(f"Response from Model: {response.text}")
Yours should be looking very similar. But it might have some small differences of course! All right, so we see that once
chat = chat_model.start_chat()
is executed, We can send messages, and read reponses via:
response = chat.send_message(user_message, **parameters)
print(f"Response from Model: {response.text}")
Superb. Let’s create a simple loop that will continue this conversation until user enters ‘exit’ or ‘quit’.
while True:
  user_input = input("You: ")
  if user_input.lower() in ['quit', 'exit']:
    print("Exiting chat. Goodbye!")
    break

  response = chat.send_message(user_input, **parameters)
  print(f"Response from Model: {response.text}")
OK that looks good. Of course we could add some error handling, some additional conditions or safety switches. But i think as our MVP this is a perfect code. Let’s also add some welcome message, and here is our full program:
import vertexai
from vertexai.language_models import ChatModel, InputOutputTextPair

vertexai.init(project="<my_project>", location="us-central1")
chat_model = ChatModel.from_pretrained("chat-bison")
parameters = {
    "candidate_count": 1,
    "max_output_tokens": 1024,
    "temperature": 0.2,
    "top_p": 0.8,
    "top_k": 40
}
chat = chat_model.start_chat()

# Informing the user about how to exit the chat
print("Welcome to the chat! Type 'quit' or 'exit' to end the conversation.")

while True:
    user_input = input("You: ")
    if user_input.lower() in ['quit', 'exit']:
        print("Exiting chat. Goodbye!")
        break

    response = chat.send_message(user_input, **parameters)
    print(f"Response from Model: {response.text}")
Time to run the program!
OK, we’ve got couple of options here. I will go into two today:
- run it locally, from your command line interface
- run it from google cloud console – from cloud shell – this might be a bit easier for newbie 🙂
Run it locally
If you decide to take my code, instead of generating it by yourself – that’s prefectly fine. Just make sure you edit line 4 and provide your project name (with enabled APIs! 😉 under project=”<my_project>” section.
In this entry I don’t want to focus how to deploy such solution into production, but it would be good to test it out, wouldn’t it? For that I will use command line interface on my computer. It can be Linux shell console, it can be Windows CMD, it can be powershell.. Two things that would need to be installed are:
- gcloud CLI – you can find detailed instructions here: Install the gcloud CLI
- Python 3 – download python
- Vertex AI SDK for Python
- detailed instructions
- it most cases it all comes to execute: `pip install google-cloud-aiplatform`
It might sound like complicated task. But chances are you have already have it all set up, or if you don’t, it might be very handy in the future when working with google cloud from your workstation.
The last step is to set the proper authentication, for that I will Set up Application Default Credentials
Long story short it comes down to run this command from your environment:
gcloud auth application-default login
And follow up the instructions. Last step is to.. well copy the code to the file and run your program with
python filename.py
python3 filename.py
depending if you’ve got python2 and python3 both installed on your laptop and which version is the default one 🙂
Run it from cloud shell
In you google cloud console just click ‘Activate Cloud shell‘ button (top right of the screen), either upload code using command line editor such as ‘vim’ or ‘Nano’, or use Open Editor to get a GUI editor, create a new file, paste the code, save the file, and that’s it. Before we run the program, make sure google-cloud-aiplatform is already installed, just run the command to install it:
pip install google-cloud-aiplatform
From cloud shell call the program with:
python <filename>.py
You might see pop-up ‘Authorize Cloud Shell’, click ‘AUTHORIZE’ so cloud shell can make an API calls with your credentials.
And that’s it! In next entries I will try to dig a bit deeper into how to deploy such program more into ‘production’ environment, or how to authenticate using other ways than ‘application-default’. Stay tuned! If you’ve got any questions, let me know.