Introduction
Serverless computing is revolutionizing the way we build and deploy applications. With serverless architecture, you don’t need to manage servers or infrastructure, allowing you to focus on writing code and delivering features. Google Cloud Functions is a popular serverless platform that allows developers to deploy functions that automatically scale with usage. In this blog post, we’ll guide you through the process of deploying a Python serverless app, an ASCII art generator, using Google Cloud Functions.

Video Tutorial
If you prefer to follow video tutorial, check out my YouTube channel tutorial:
Overview of the ASCII Art Example
The example we’re using is a simple Python serverless app that generates ASCII art from a given input string. The app utilizes the ‘art’ package to generate the ASCII art and Flask for handling HTTP requests. The source code for the example is available in the serverless-examples repository on GitHub.
Setting up the Google Cloud Platform
To deploy the app on Google Cloud Functions, you need a Google Cloud Platform (GCP) account. If you don’t already have one, sign up for a free trial at the GCP Console. Once you’re signed in, create a new project.
Preparing the App for Deployment
First, clone the serverless-examples repository:
git clone https://github.com/ontaptom/serverless-examples.gitNavigate to the ascii-art folder:
cd serverless-examples/ascii-art
Deploying the App to Google Cloud Functions
Install the Google Cloud SDK by following the official installation guide. Once installed, log in to your Google Cloud account using:
gcloud auth login
Set your active GCP project:
gcloud config set project <your-project-id>
Deploy the function:
gcloud functions deploy hello_ascii --runtime python310 --trigger-http --allow-unauthenticatedTesting the Deployed Function
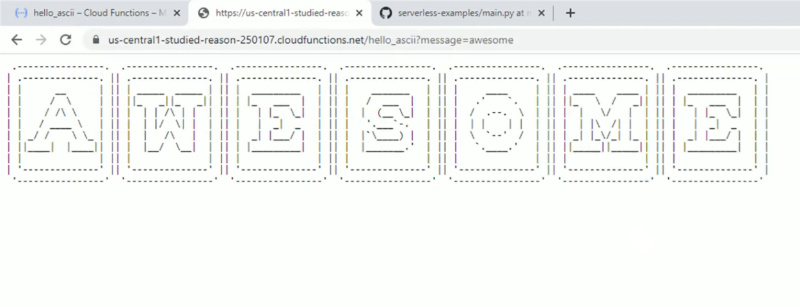
Once the deployment is complete, Google Cloud will provide a URL for the deployed function. To test it, open the URL in a web browser. You should see the ASCII art representation of the default message, “Hello”.
To use a custom message, add a query parameter to the URL:
https://REGION-PROJECT_ID.cloudfunctions.net/hello_ascii?message=YourMessage
Replace REGION, PROJECT_ID, and YourMessage with your Google Cloud region, project ID, and desired message, respectively.
Conclusion
In this blog post, we demonstrated how to deploy a Python serverless app using Google Cloud Functions. With this knowledge, you can now deploy your own serverless apps and harness the power of serverless computing with Google Cloud Platform.