I already wrote few words about Unisphere in post EMC VNX – How to use Unisphere. In this post I would like to show you a little bit more in practice how you can start working with EMC Unisphere.
How to launch?
As I mentioned in my previous post, easiest way to launch is to fire up and Internet Browser and type the IP address of Control Station. TIP: You have to have Java installed and available.
When you see login screen just login with your credentials. If you log in for the first one you can probably login with the standard credentials:
* login: sysadmin
* password: sysadmin
Worked? Great. After you log in you should see screen like the one below:

Unisphere Dashboard
I have added few comments in red. First thing you have to notice is that you see a Dashboard. If you have more then one VNX in the domain you are actually not yet login to the specific VNX, but for the overall dashbord (of course it depends on the Scope of your credentials, but I assume you login as a sysadmin).
If you would like to work / manage single storage system you have to choose it, either from drop-down list in top left corner, or click on the hostname below the menu.
Working with Storage Array
Once you have selected a desired VNX Array your Dashbord should change a little, and look more like:

Unisphere VNX Dashboard
It is opened in the same window. You have more specific information about your Array. First you see all important (recent) system alerts. On the right top window you should see basic information, hint: here you will find serial number, often needed 🙂
Let’s take a quick tour thru the menu options
System
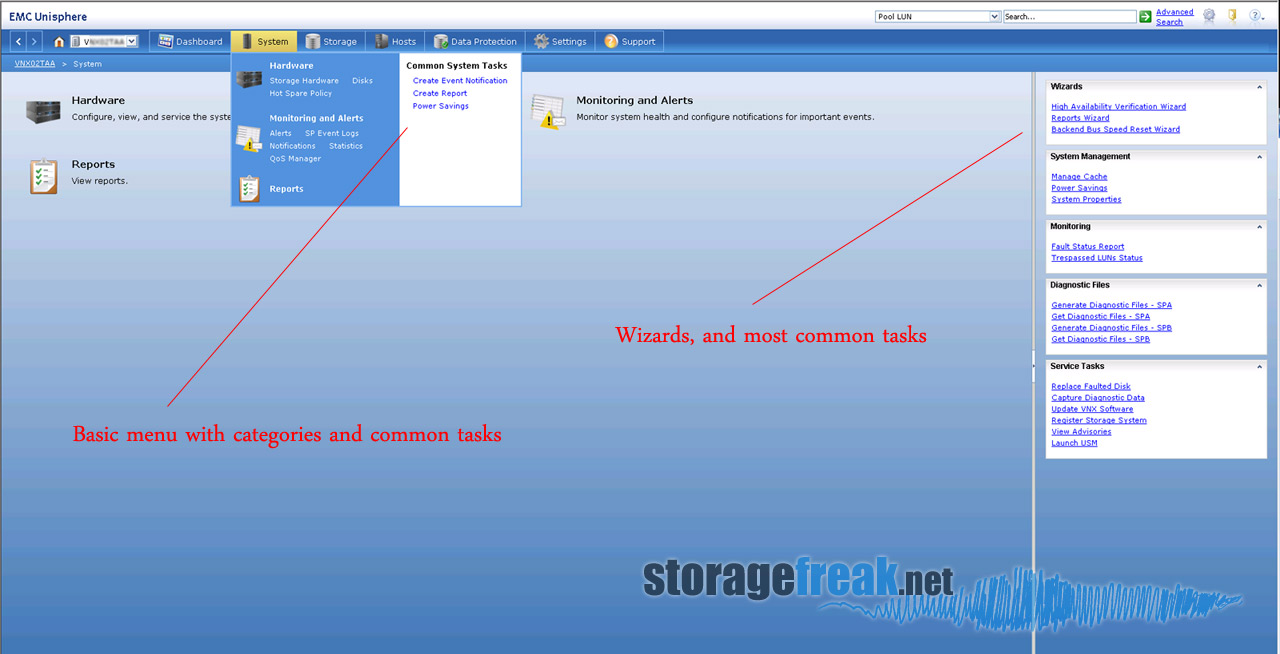
Unisphere System menu
Each menu have several options. You can either click on the top menu choise (System,Storage,Host,Data Protection etc.) or just hover over it and wait to more options to pop up. System have three choices:
- Hardware – here you can find all hardware information, from single harddrive information to FAN status.
- Monitoring and Alerts – all alerts are here, you can gather SP Event Logs, Notifications, Statistics and more, even schedule sending e-mail with statistics.
- Reports – place where you can generate reports
Storage
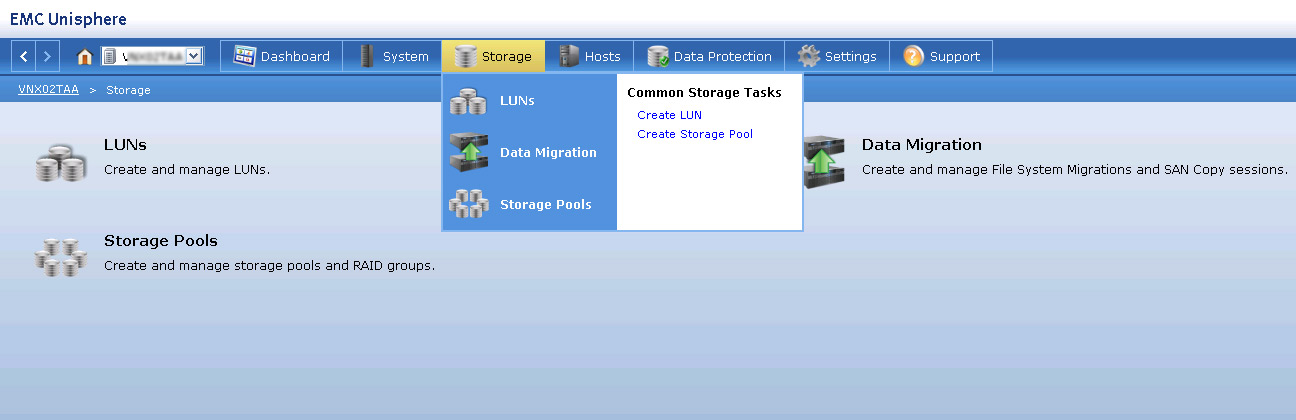
Unisphere Storage menu
This tab will be probably often visited in your daily tasks. The number of options available here may vary depends on version, licenses etc. For example if you have VNX for file, you would see here much more :).
In this section you can actually provision Storage, create LUN’s or Storage Pools, etc. More detailed examples I will put in the short future.
Hosts
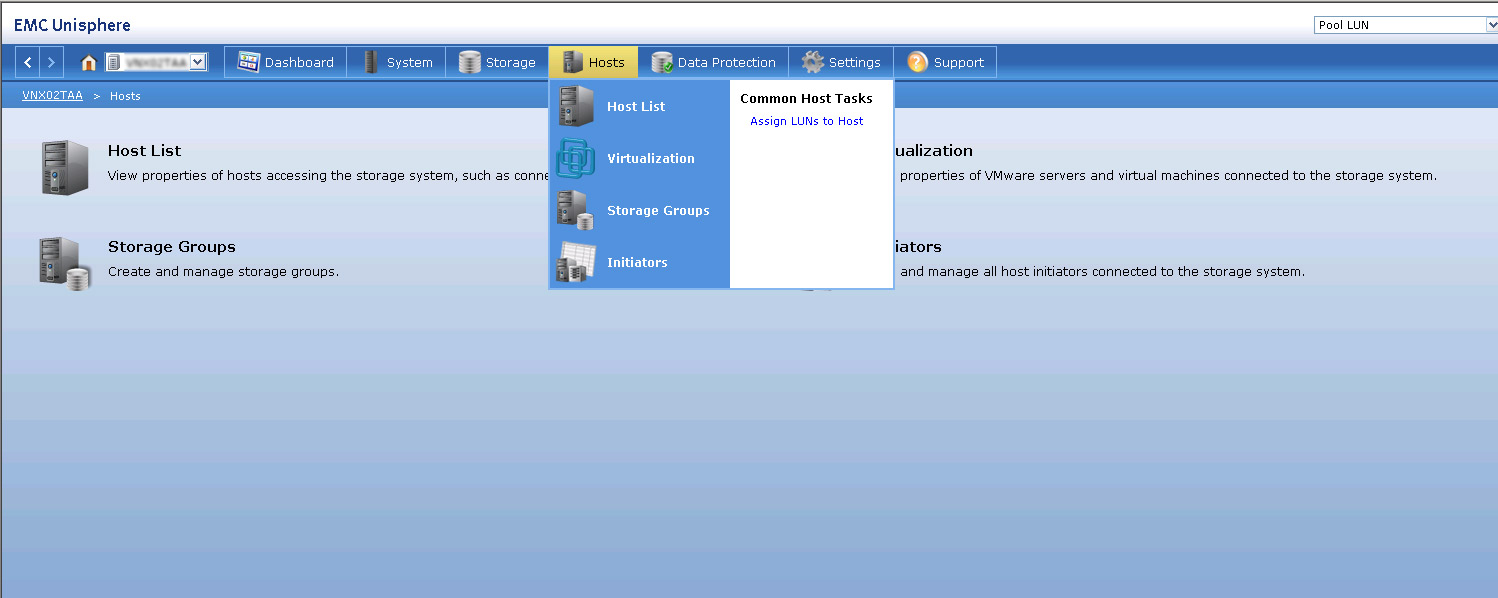
Unisphere Host menu
In this tab the most important section is probably Storage Groups where you can define new, delete old or modify already existing Storage Groups. But of course to create a Storage Group that has any kind of purpose you have to have a Host, list of hosts you can find in Host List. Let’s go a little bit deeper, to have Host you can actually need to have some Initator.In this post I don’t want to go deeper, but I promise I will explain more in future posts.
OK, we have already quite a long article, I hope this give you a basic overview how to even start working with Unisphere. Have fun and be extra careful, do not experiment with any ‘production’ VNX! 🙂
Thanks a lot.
You describe complex subjects as nice as in seems so easy.
The best tutorial I ever read about vnx
May i know your email address?
Hi,
I completely agree with Hossein, You describes the topics in the best possible way.
Thanks a Lot.